> ## Documentation Index
> Fetch the complete documentation index at: https://docs.woopsocial.com/llms.txt
> Use this file to discover all available pages before exploring further.
# Integrating MCP in AI Agents, Claude, ChatGPT
> Set up Claude Desktop, Claude Code, Cursor, ChatGPT, and other MCP clients with WoopSocial
Use this page to connect the WoopSocial MCP server to your AI agent, Claude, ChatGPT or your CLI.
## Prerequisites
* A WoopSocial account
* A connected social media account on WoopSocial
* Access to the AI Agent/AI Chat/CLI you want to configure
## Select your AI tool or Agent
* [Claude Chat / Cowork](#claude-cowork)
* [Claude Code](#claude-code)
* [Codex](#codex)
* [All AI Agents](#ai-agents)
* [ChatGPT](#chatgpt)
* [Notion](#notion)
* [Gemini CLI](#gemini-cli)
* [Cursor](#cursor)
Claude Chat / Cowork
1. Grab your MCP link from your [API Key Page](https://app.woopsocial.com/api-access)
2. Make sure you have at least one social media account connected ([Connect accounts in your dashboard](https://app.woopsocial.com))
3. Then go to your Claude app
4. Go to **Settings** in Claude → **Connectors** → **Customize**
5. Click **Add Connector** → **Add Custom Connector**
6. Name it ‘woopsocial’ and use [https://api.woopsocial.com/mcp](https://api.woopsocial.com/mcp) as the URL
7. Click **Add** and **Authorize** on the next page
8. **Start a new Chat** in Claude → Ask it to write a test post to your social account for tomorrow
9. It will find your **Project ID** and **Social Account ID** and will schedule a test post for tomorrow
10. If you want, you can delete the post straight away
**Note:** You might need to add the media server (where your images and videos are stored) to your allowed domains by going to **Settings** → **Capabilities** → **Domain Allowlist** → **Add**`*.cloudflarestorage.com`(including the asterisk/star)
Issues? Just use the chat button in the bottom right and we’ll help you out.
Claude Code CLI
Use the `claude mcp add` command to register WoopSocial with Claude Code.
```bash theme={null}
claude mcp add --transport http woopsocial "https://api.woopsocial.com/mcp"
```
1. Ensure that you have a [WoopSocial account](https://app.woopsocial.com) and you are logged in
2. Connect a social media account [through your WoopSocial dashboard](https://app.woopsocial.com)
3. Start `claude`
4. In Claude, type `/mcp`
5. Select the `woopsocial · △ needs authentication` menu item
6. Select `Authenticate`
7. This should take you to WoopSocial where you can Authorize the MCP connection. Click the "**Authorize**" button.
8. Return to Claude
9. Ask Claude to do something with the MCP. For example tell it to "List my social accounts in woopsocial" or "Create a new post for my Facebook account and schedule it for tomorrow 1pm"
Issues? Just use the chat button in the bottom right and we’ll help you out.
Codex CLI
1. Ensure that you have a [WoopSocial account](https://app.woopsocial.com) and you are logged in
2. Connect a social media account [through your WoopSocial dashboard](https://app.woopsocial.com)
3. Use the `codex mcp add` command to register WoopSocial with Codex.
```bash theme={null}
codex mcp add woopsocial --url https://api.woopsocial.com/mcp
codex mcp login woopsocial
```
4. This should take you to WoopSocial where you can Authorize the MCP connection. Click the "**Authorize**" button.
5. Ask Codex to do something with the MCP. For example tell it to "List my social accounts in woopsocial" or "Create a new post for my Facebook account and schedule it for tomorrow 1pm"
Issues? Just use the chat button in the bottom right and we’ll help you out.
Get your MCP URL for other AI agents
Claude Code above used our OAuth-based MCP authentication but this is not yet compatible with all AI agents. In such cases, please follow the procedure below which will generate an MCP URL for you backed by an API key.
1. Open the [WoopSocial dashboard API page](https://app.woopsocial.com/api-access).
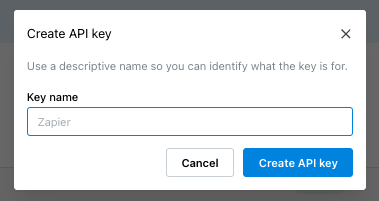
2. Click on the "Create API key" button.
3. Give the key a name so you can identify it later.
 4. Copy the MCP URL from the key details page.
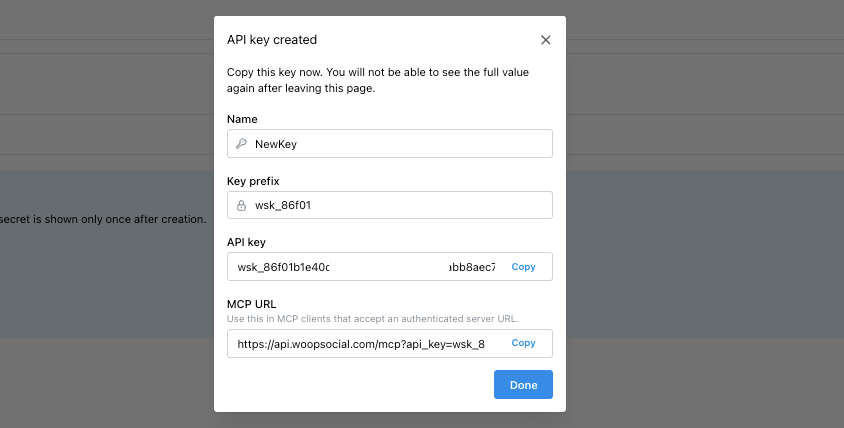 The MCP URL uses this format:
```text theme={null}
https://api.woopsocial.com/mcp?api_key=YOUR_API_KEY
```
5. Make sure you have at least one social media account connected ([Connect accounts in your dashboard](https://app.woopsocial.com))
6. Return to your AI agent
7. Ask your AI agent to do something with the MCP. For example tell it to "List my social accounts in woopsocial" or "Create a new post for my Facebook account and schedule it for tomorrow 1pm"
Issues? Just use the chat button in the bottom right and we’ll help you out.
The MCP URL uses this format:
```text theme={null}
https://api.woopsocial.com/mcp?api_key=YOUR_API_KEY
```
5. Make sure you have at least one social media account connected ([Connect accounts in your dashboard](https://app.woopsocial.com))
6. Return to your AI agent
7. Ask your AI agent to do something with the MCP. For example tell it to "List my social accounts in woopsocial" or "Create a new post for my Facebook account and schedule it for tomorrow 1pm"
Issues? Just use the chat button in the bottom right and we’ll help you out.
ChatGPT
1. Grab your MCP link from your [API Key Page](https://app.woopsocial.com/api-access)
2. Make sure you have at least one social media account connected ([Connect accounts in your dashboard](https://app.woopsocial.com))
3. Now go to your ChatGPT dashboard
4. Open `Settings`.
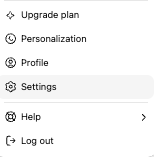 5. Open `Apps`.
6. Enable `Developer Mode` if it is not already enabled.
5. Open `Apps`.
6. Enable `Developer Mode` if it is not already enabled.
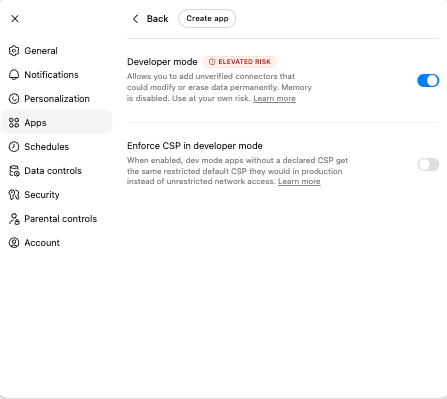 7. Select `Create App`.
8. Enter these values:
* Name: `WoopSocial`
* Description: `Publish social media content`
* MCP Server URL: paste the MCP URL you copied earlier
* Authentication: `No Auth`
7. Select `Create App`.
8. Enter these values:
* Name: `WoopSocial`
* Description: `Publish social media content`
* MCP Server URL: paste the MCP URL you copied earlier
* Authentication: `No Auth`
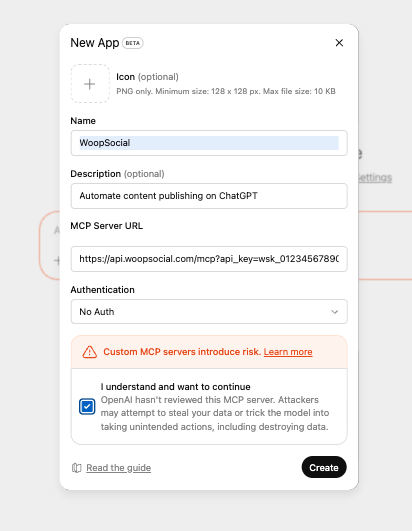 9. Save the app.
10. Return to ChatGPT and start a new chat
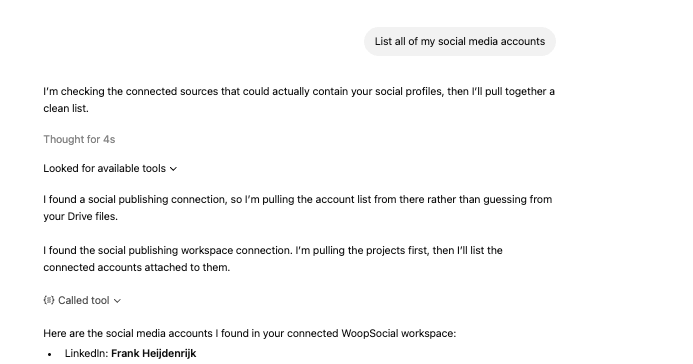
11. Ask ChatGPT to do something with the MCP. For example tell it to "List my social accounts in woopsocial" or "Create a new post for my Facebook account and schedule it for tomorrow 1pm"
9. Save the app.
10. Return to ChatGPT and start a new chat
11. Ask ChatGPT to do something with the MCP. For example tell it to "List my social accounts in woopsocial" or "Create a new post for my Facebook account and schedule it for tomorrow 1pm"
 Issues? Just use the chat button in the bottom right and we’ll help you out.
Notion
1. Grab your MCP link from your [API Key Page](https://app.woopsocial.com/api-access)
2. Make sure you have at least one social media account connected ([Connect accounts in your dashboard](https://app.woopsocial.com))
3. Now go to your Notion dashboard
4. Go to Settings → Connections → + Add Custom MCP
5. Enter your unique MCP Server URL (from step 1) and name it “woopSocial”
6. Click Connect and complete the OAuth flow
7. Ask the chat to “Find my project ID and find my social account IDs with the Woopsocial tools. Then schedule a test post for tomorrow”
8. Delete the test post and start creating your own content
Issues? Just use the chat button in the bottom right and we’ll help you out.
Gemini CLI
1. Grab your MCP link from your [API Key Page](https://app.woopsocial.com/api-access)
2. Make sure you have at least one social media account connected ([Connect accounts in your dashboard](https://app.woopsocial.com))
3. Run:\
`gemini mcp add woopsocial npx -y mcp-remote ` `https://api.woopsocial.com/mcp`
4. Or `edit ~/.gemini/settings.json manually` and add:\
`{ "mcpServers": { "woopsocial": { "command": "npx", "args": ["-y", "mcp-remote", "https://api.woopsocial.com/mcp"] } }}`
5. Put the following prompt in Gemini: “Find my project ID and find my social account IDs with the Woopsocial tools. Then schedule a test post for tomorrow”
6. Delete the test post and start creating your own content
Issues? Just use the chat button in the bottom right and we’ll help you out.
Cursor
1. Make sure you have at least one social media account connected ([Connect accounts in your dashboard](https://app.woopsocial.com))
2. Simply [go to our official Cursor Directory Page](https://cursor.directory/plugins/woopsocial-social-media-scheduler)
3. Click “**Add to Cursor**”
4. Run through the authorization sequence
5. Put the following prompt in Cursor: “Find my project ID and find my social account IDs with the Woopsocial tools. Then schedule a test post for tomorrow”
6. Delete the test post and start creating your own content
Issues? Just use the chat button in the bottom right and we’ll help you out.
# Media upload fix for Claude and ChatGPT
If the client has an allowlist for outbound domains, add `*.cloudflarestorage.com` so media uploads work.